If you’ve ever installed WordPress before, you’ve probably used cPanel. But what exactly is cPanel? How do you access it? And how do you use the many tools available?
While cPanel is primarily designed for technical users, knowing how it works is very useful for anyone that manages a website. By learning just a few controls, you can quickly fix minor website issues yourself and save a lot of time or money.
In this post, we’ll briefly explain how cPanel functions, why you need to use it, walk you through using it to install WordPress, create an email account, add a subdomain to your site, and more.
Let’s get started!
What Is cPanel?
cPanel is a control panel that lets you perform a variety of tasks on your website. It is usually provided by web hosts and is installed by default at the back end. Tools include installing WordPress, setting up email accounts, creating subdomains, installing SSL certificates, and tons of other important things.
cPanel is well-known in the WordPress community, largely because it’s one of the primary ways that you can install WordPress on your website. While managed hosts like WPEngine will install and manage WordPress for you, other WordPress-focused web hosts use cPanel (or a tool like it).
What You Can Do With cPanel?
cPanel is really powerful and can perform dozens of operations.
Let’s talk about some of the most important ones:
- Install software packages like WordPress or Drupal
- Create email accounts and set up forwarding addresses
- Add and manage domains
- Install an SSL certificate
- View metrics like visitors and bandwidth
- View and manage files
- Access your site’s databases
Try a Demo
cPanel.net offers a free demo which you can use to explore the software. While it doesn’t have the full version of each tool, it is nonetheless useful for getting a general idea of what cPanel is all about.
cPanel vs. Plesk
Plesk is another well-known control panel system. While it’s not as popular as cPanel, it is still widely used by many WordPress hosts. What’s the difference? Which one is better?
Let’s briefly answer these questions.
- Both cPanel and Plesk have essentially the same features
- If you’re a reseller, Plesk tends to be slightly less expensive
- cPanel has stronger features for resellers, hosting companies and other large organizations.
- cPanel is older and has a “classic website” design. Plesk, on the other hand, has a design that is more modern and looks somewhat like WordPress.
cPanel vs. WHM
WHM, which stands for Web Host Manager, is another program that is commonly mentioned alongside cPanel. WHM lets you manage multiple cPanel sites in a single location. You can think of it as being “above” cPanel.
You can’t actually create cPanel accounts from within cPanel itself, so you have to use WHM to do so.
WHM also has other features, including server monitoring, customer account management (for resellers), and file transfers. Otherwise, it is mostly used by freelancers that need to manage different client websites in a single location.
cPanel vs. Managed Hosts
What is a managed host? A managed host is a web host that will handle all maintenance, updates, security, and other essential aspects of running your website. These plans usually cost more money than regular hosting plans, since things will be handled for you.
Some of the most well-known hosts that offer managed plans are WPEngine, SiteGround, and GreenGeeks. Check out our guide to the best managed hosts on our blog.
Usually, managed hosts don’t use cPanel, as the entire management process is done by the hosting company. You can’t access the backend of the site and (because you’re using a managed host), the assumption is that you won’t want to.
Hosts That Use cPanel
Most, but not all, hosts that specialize in WordPress use cPanel. These include A2Hosting, HostGator, InMotion, Bluehost, and dozens of others.
However, popular options like SiteGround and DreamHost do not use cPanel. Both have custom panels that mimic cPanel functions but are designed slightly differently.
Using the cPanel Admin
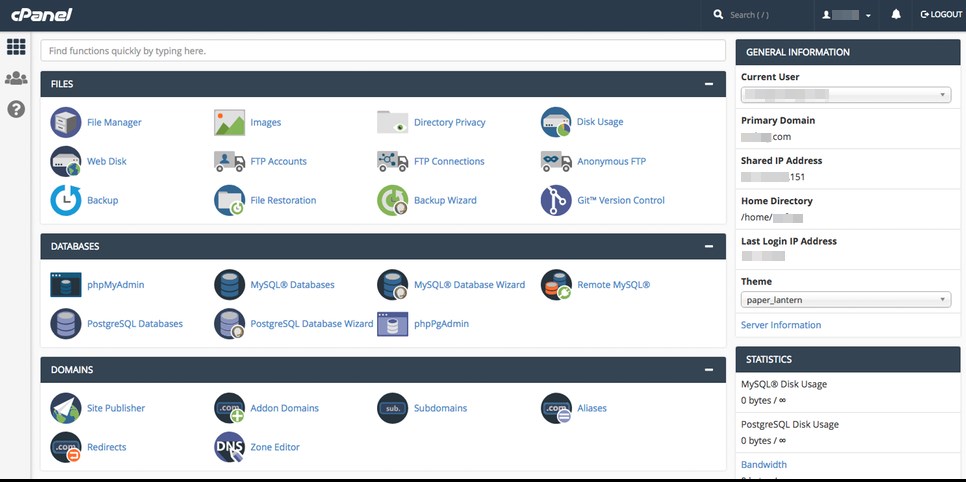
First, let’s briefly cover using cPanel itself. While there is no universal version of the software and they differ slightly depending on the host, the same basic design is the same.
How to Access cPanel?
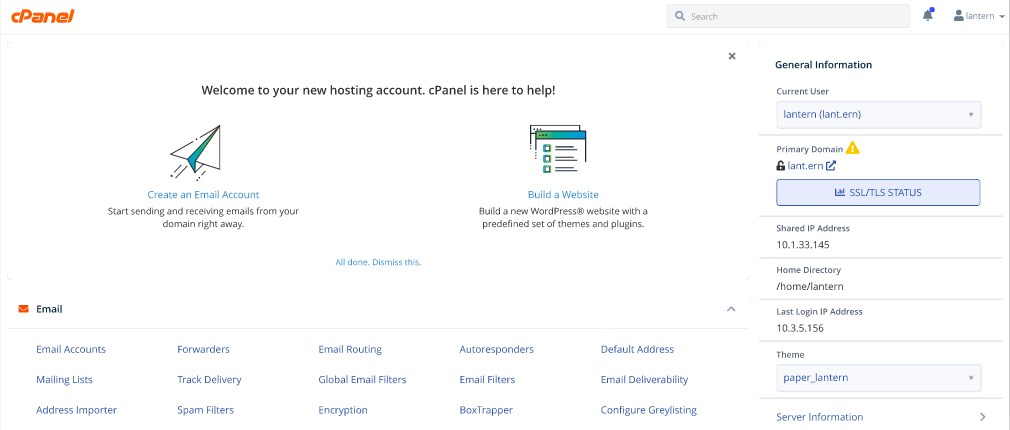
If your web host uses cPanel, they probably included instructions on logging into cPanel inside your welcome email. Double check your inbox for these credentials.
If you can’t find them, don’t worry! Most hosts allow you to access the cPanel in two different ways:
Directly by going to yoursite.com/cpanel. The exact URL can vary, but most hosts reserve /cpanel for access to the cPanel login page.
Via your account page on the host’s website. As you can imagine, the specific location depends on the host. Here are some guides from popular hosts:
- NameCheap. On your account sidebar, the login links are under Hosting List.
- Bluehost. In the control panel, it is under the Advanced tab.
- HostGator. It depends on your hosting plan. See the link.
- InMotion. Log in to your Account Management Panel (AMP) and click the cPanel button under your account name.
How to Search in cPanel?
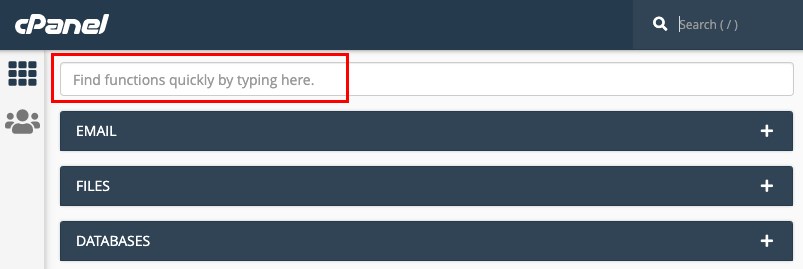
Since there are so many tools, it is helpful to use the search functionality. There are actually two search bars: one that is at the top of the page and one that is in the sticky top menu. Both will return the same results.
Changing Your cPanel Settings
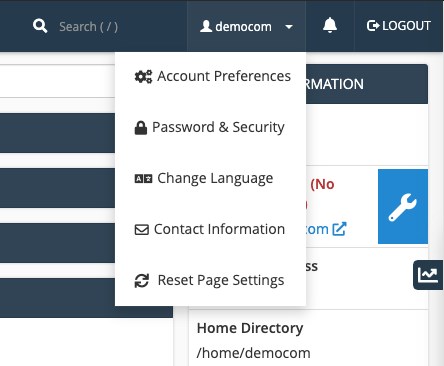
To change your settings in cPanel, click on your account name in the top right corner of the screen. Here, you can modify your account preferences, change your password, change the interface language, and reset all of your modifications.
Manage Users
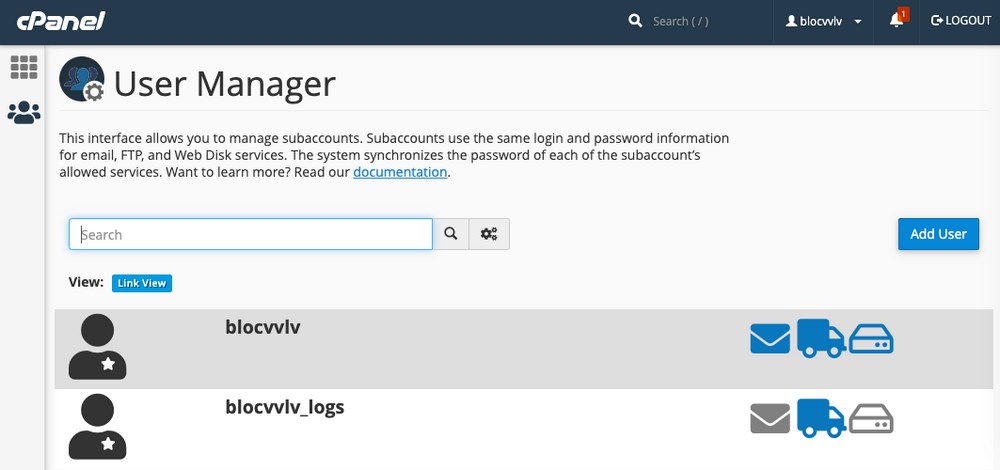
If you click on the three people icon in the top left, you’ll go to the User Manager. Here, you can create sub-accounts, which are used for email, FTP, and Web Disk services. Learn more about the User Manager in the CPanel documentation.
Note that you cannot create new cPanel accounts from this page. You’ll need to use WHM to do that. Read this tutorial to learn more.
Walkthroughs for Common Use-Cases
As we mentioned above, cPanel can do many things. Let’s walk through some of the most common actions that you may want to do with cPanel!
- Install WordPress
- Create an Email Account
- Access Your Databases
- Backup Your Site
- Add-on Domain
- Create a Subdomain
- Upload/Manage Files on Your Site
- Manage DNS
- Redirects
- Add a SSL Certificate
Install WordPress Using cPanel to Create a Website
Perhaps the most common reason cPanel is used is to install WordPress. Luckily, the entire process is really easy and only takes a few minutes. Let’s walk through the process.
Step 1: Find the WordPress Manager App
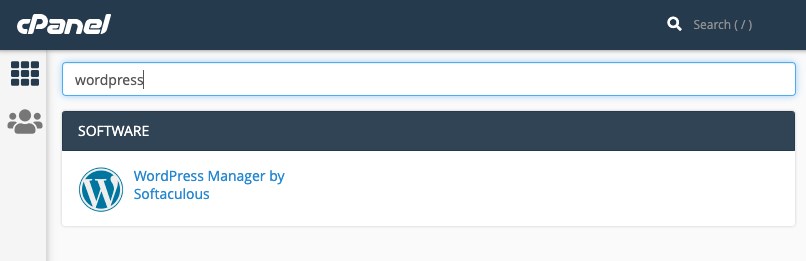
The program we’ll use to install WordPress is called WordPress Manager by Softaculous. Use the search bar to find it, then click on it.
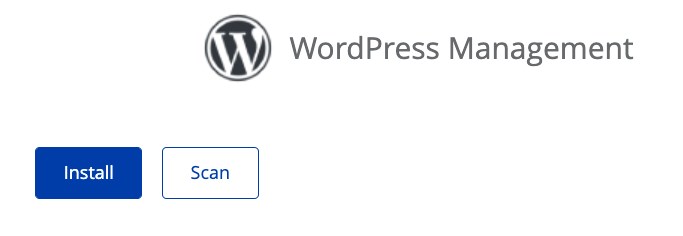
Next, click the install button. If you already have installed WordPress, you’ll also see the installations listed below.
Step 3: Fill Out the Form

Now add the information about your website, including the site name, domain name, site description, and other settings. We strongly recommend that you use HTTPS, however, you’ll first need to have a SSL certificate installed before this option is available. See the guide below to learn more.
Once you’ve filled everything out, click Install.
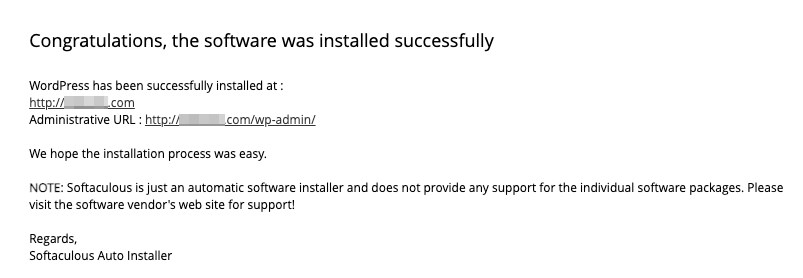
And that’s it. If you haven’t already set up your Nameservers, you’ll need to do that now. Read this guide to learn more about it.
Create an Email Account in cPanel (Webmail)
Setting up an email account is critical for maintaining your website. Let’s walk through creating one using cPanel.
Step 1: Search for the Email Accounts App
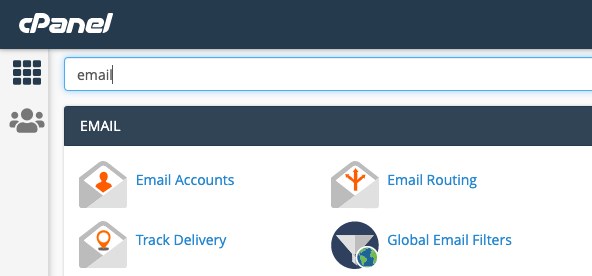
In the cPanel search bar, search for “email.” Click the first item that appears, Email Accounts.
Step 2: Click the Blue Create Button
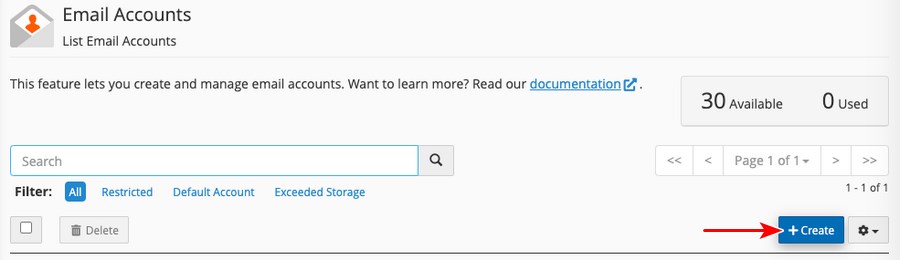
In the bottom right corner of the screen, click the +Create button.
Step 3: Fill Out the Information
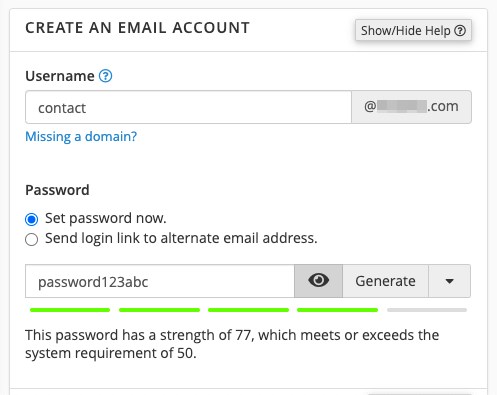
Now fill out the information for your email account. If you scroll down, you can modify additional options like storage space, automatic cleaning of folders, and more.

That’s it! You’ll now see your email address listed.
Access Your Databases Through cPanel
To access your WordPress database, you’ll need to use cPanel. Specifically, you’ll want to use a program called phpMyAdmin. This application loads right from the cPanel interface.
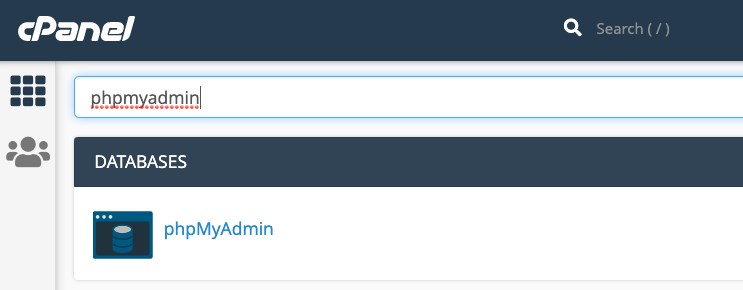
First, search for the application using cPanel’s search function. Click on the icon.
Step 2: Select Your WordPress Database
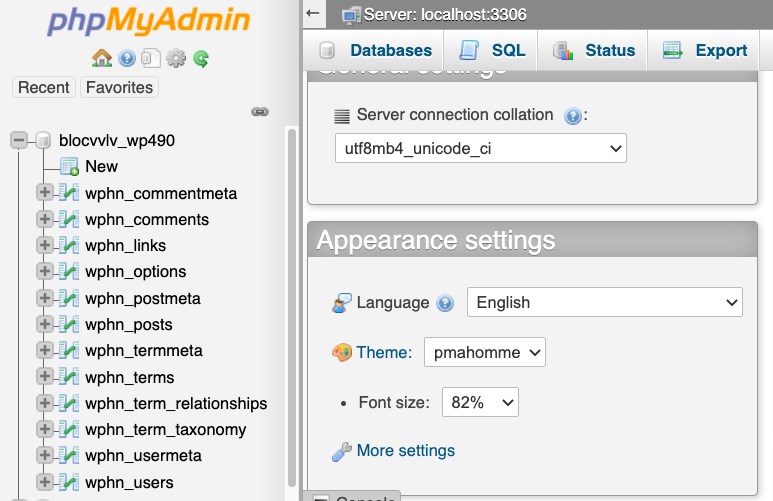
Now you’ll see some items on the left hand side of the screen. These are the tables in your database. Click the plus sign to expand a particular item and you’ll see the different items beneath it. When you click on a specific one, it will load on the right side of the screen.
Backup Your Site Using cPanel
In general, it’s easier to use a plugin like Updraft to back up your site. Check out our list of the 10 best plugins for backing up your site, or read our step-by-step guide to Updraft.
However, you can use cPanel to backup your site, too. Let’s learn how.
Step 1: Open the Backup Wizard Application
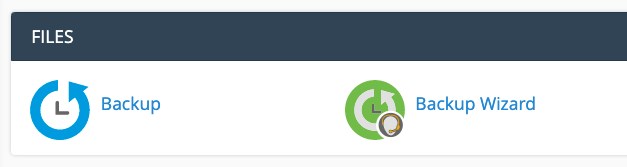
In most cPanel installations, there will be at least two applications you can use to back up your site: Backup and Backup Wizard. We’ll use the second one, because it is designed to be used by beginners.
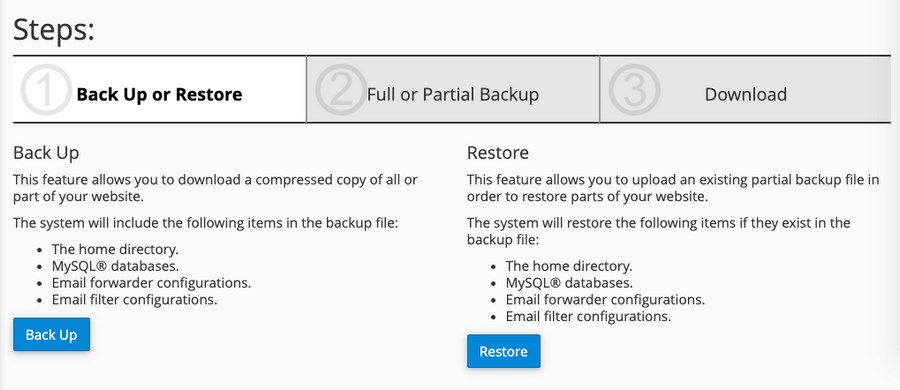
On the next page, you can either backup or restore your backup. Since we don’t have any previous backups yet, click Back Up.
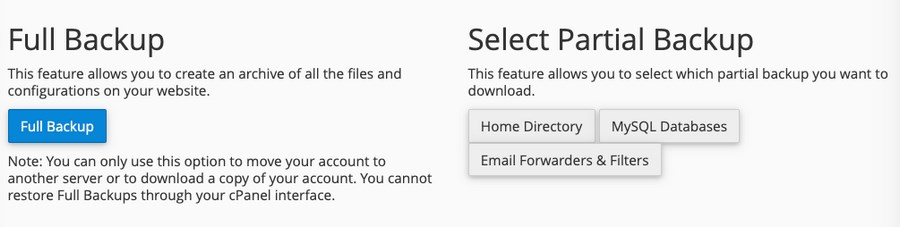
Now you can choose which type of backup you want to do: Full or Partial. Partial backups can be of your Home Directory, MySQL Database, or Email settings.
Note that Full Backups cannot be used to restore your site directly via the cPanel interface. They are only for downloading a copy of your site or moving to a different server.
For now, we will select Full Backup.
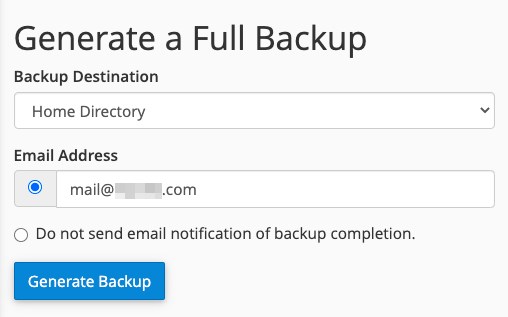
Finally, back up your site. Under Backup Destination, select where you’d like the backup to be stored. In addition to your home directory, you also can set it to an external FTP. The email listed in Email Address will receive a notification once the backup has been completed.
Add-on Domains in cPanel
Add-on domains are necessary to use if you want to use more than one domain on your web hosting installation. They let you control multiple domains from a single account.
Note that you’ll first need to purchase a domain from a registrar. Learn more about the process on our blog.
Step 1: Find the Addon Domains Application
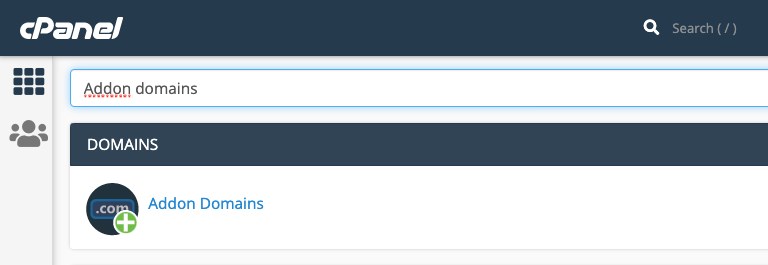
Find and open the Addon Domains app in cPanel.
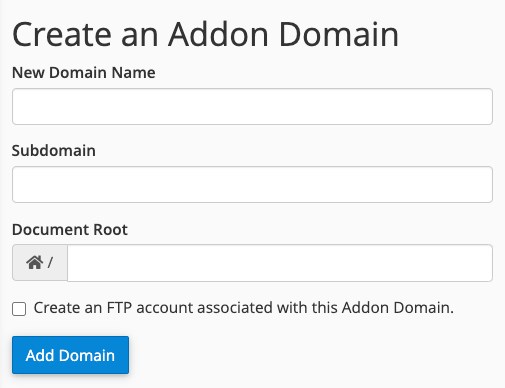
Now, add your domain and possible subdomains. The document root will be populated automatically, but you can change it if you like.
You can also choose to create an FTP account that is associated with the domain, making it easier to manage its files.
Read more about addon domains in cPanel’s help documentation.
Create a Subdomain in cPanel
A subdomain is a portion of your website that is before the domain. For example, in the URL shop.website.com, the shop portion is a subdomain. Subdomains are useful for creating separate sections on your website, like a shop.
Step 1: Find the Subdomain Application
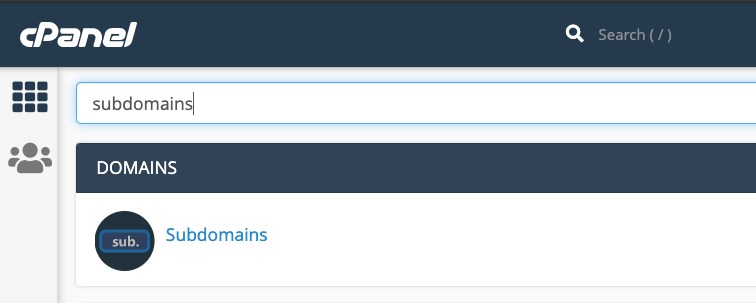
To create a subdomain on your site, find the Subdomains application.
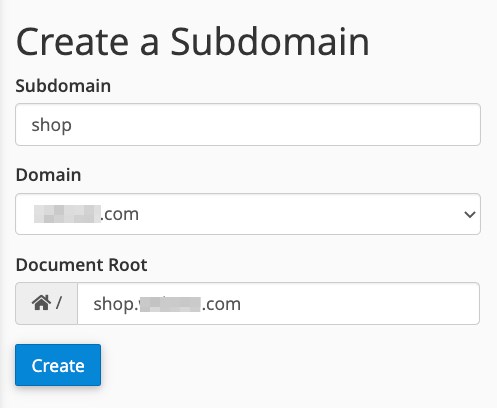
Then, add the subdomain you’d like to have on your website. Once you add it, you’ll see the home directory automatically populate under Document Root. You can change it, if you like.
When you’re done, press Create. You’ll then see your subdomain listed below.
Use cPanel to Upload and Manage Files on Your Site
Usually, it’s better to access files via FTP/SFTP, as you can more easily upload and download files. However, you can also view and manage them from within your cPanel account.
Step 1: Open the File Manager Application
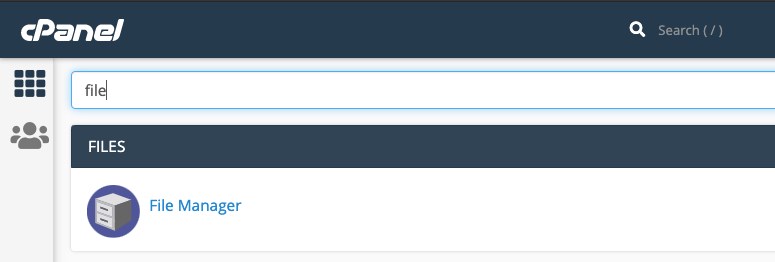
To begin, open the File Manager application.
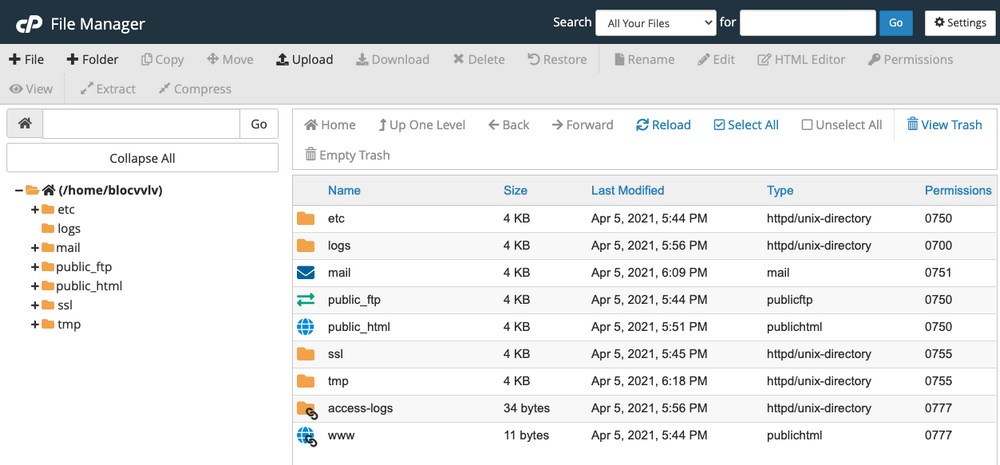
Now you’ll see a directory of all your files. Let’s run through some of the most common actions you might want to take in the File Manager.
- To open a folder, double click on it.
- To navigate from within a file or folder, use the Up One Level, Back and Forward buttons.
- To delete a folder or file, first select it and then click the Delete button in the top center of the page. You can also right click the item and select delete.
- If you double click on a file, it will be downloaded to your computer. If you want to edit it directly without having to download and reupload it, click the file once and then press Edit in the top right of the page. You can also right click the file and select edit.
- To upload a file, first make sure you’re in the directory you’d like to upload the file to. Then, click the Upload button. You’ll be taken to another page where you can select the file you’d like to upload. If you check the box Overwrite existing files, your new file will overwrite an existing file.
Manage DNS via cPanel
DNS, which stands for Domain Name System, is the protocol that manages domain names on the Internet. There are many DNS records, like A, TXT, and CNAME, which are needed in order to make your domain name work properly. You can modify these records directly in cPanel.
If you bought your domain name and hosting from the same company, you will rarely, if ever, need to manage DNS. However knowledge is power, so here we go.
Step 1: Open the Zone Editor Application
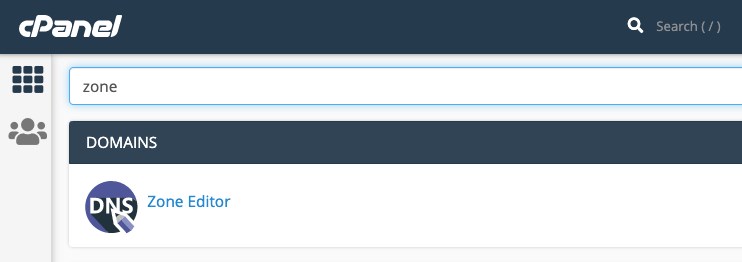
To edit DNS records, you’ll need to use an application called Zone Editor. Find it and open it.
Step 2: Choose the Record Type

Now you’ll see your domain and the available actions. We won’t go through the steps of adding each one, but to briefly explain what they each do:
- A Record: A Records map your domain name (website.com) to your IP address.
- CNAME Record: A CNAME record is used to map one domain name to another. Usually, this is done to make www.website.com redirect to website.com (without the www) or vice versa. CNAME records cannot be pointed to an IP address.
- MX Record: A MX record, which stands for mail exchanger, designates the mail server that will accept emails sent to a specific domain. In simple terms, it means that it makes sure any emails sent to @yoursite.com are sent to yoursite.com
- Manage: This lets you manage all of the currently existing records.
Once you add a record, it can take up to 24 hours to propagate through the internet. Don’t be worried if it seems like it didn’t work!
Redirects
Redirects are useful for a number of situations. In particular, redirects are essential if you’ve changed your domain name and want to redirect visitors from the old site to the new one.
For example, rather than letting all your old traffic disappear, you can point them to your new domain to hopefully keep their custom. Redirects are also very useful for SEO.

First, find the Redirects application and open it.

Now you’ll see a number of different options. Let’s go through each one:
- Type: This will make your redirect either temporary or permanent. This is primarily for search engines. If you select permanent, search engines will interpret the new site as the official one. If you select temporary, they won’t.
- Website: This is where you need to select your domain. Depending on your installation, it will either be http or https and with www or without www.
- /: Instead of your entire site, you can also choose a specific page or subfolder to redirect.
- Redirects To: Put your new domain here.
- www. redirection: These options let you control which version of your site will be redirected. You can choose whether to redirect site.com (without the www), www.site.com, or both. Most of the time, you want both.
- Wild Card Redirect: If you check this, all files in the website directory will be redirected to the same file path in the new one. For example, old-website.com/document.pdf will be redirected to new-website.com/document.pdf.
When you’re done, press Add to create the redirect. That’s it!
Add an SSL Certificate Using cPanel
An SSL certificate is a must for keeping your site secure. If you have one properly installed, you’ll see a little lock icon in the URL navigation bar and your site will have https in front of the www.
If you don’t have SSL installed, you won’t have the lock, only http will be in the URL navigation bar, and some browsers (like Chrome) will flag your site as unsafe. So, it’s really important to install one!
Luckily, it’s a very simple process.
There are a few options for installing a SSL certificate. Some cPanel hosts come with an application called Let’s Encrypt. This application will let you easily create a SSL certificate for your domain. Other hosts have their own specific tools.
For this brief tutorial, we’ll use Let’s Encrypt.
Step 1: Find the Let’s Encrypt Application
First, search for the application and open it.
Step 2: Scroll Down and Click Install New SSL Certificate
Once you open the application, scroll down and click the button that says New SSL Certificate.
Step 3: Select Your Domain
Then, pick your domain and choose between Let’s Encrypt SSL and Let’s Encrypt Wildcard:
- Let’s Encrypt SSL will secure just the specific domain (domain.com)
- Let’s Encrypt Wildcard will secure the domain and any subdomains (subdomain.domain.com)
Click install.
Step 4: View Your Certificates
Back on the main page, you’ll see your SSL certificate listed. If you want to turn a regular Let’s Encrypt SSL certificate into a wildcard one, just press the Get Wildcard button.

Pros and Cons of using cPanel
cPanel is the most popular control panel. But, just like any other control panel, it has benefits and drawbacks.
Pros of cPanel:
The benefits of cPanel include:
Easy to use interface
cPanel offers lots of features arranged in manageable modules. It allows you to locate categories quickly and access the features you need in a very intuitive way.
Simple installation
cPanel is automatically installed on your hosting plan, so there’s no work for you.
Even if you’re building your own web server, cPanel is very easy to install, unlike some other control panels. It doesn’t take much time with configuration and setup either, which is definitely a good thing!
Wide range of features
cPanel has many features that enable you to manage every aspect of web hosting easily.
Using cPanel requires no technical knowledge; you can perform complicated tasks like creating a subdomain, FTP accounts, managing SQL databases, and much more.
Support and reliability
The many active forums and number of blogs make cPanel very easy to use. It has technical manuals that explain how to use the cPanel products and solve issues.
Just like WordPress, cPanel has resources covering just about everything you could possibly need to know.
Cons of cPanel:
There are a few downsides to cPanel too:
Data loss risk
We’ve seen a few cases where cPanel accidentally overwrites server settings and removes data during major updates.
Your web host will usually manage any data loss, but it’s definitely something to be aware of.
Expensive pricing
cPanel is relatively expensive compared to other control panels. While that cost is borne by the web host, it will need to be paid for with higher hosting fees.
Security threat
Research states that the two factor authentication (2FA) in cPanel is vulnerable to brute force attacks. As 2FA is used extensively to protect web hosting plans and cPanel, it’s definitely something to be aware of.
Video Overview of cPanel
Want to know more about what cPanel is and how it works? Here’s a quick video that walks you through cPanel and its most popular features!
While cPanel is very intuitive to use, it’s always good to see how you’re supposed to use it!
Conclusion
That just about covers everything you could possibly need to know about cPanel! While it does seem like a complex program, it’s pretty simple once you get the hang of it.
In this post, we explained how cPanel works and how to navigate the different applications. We also showed you how to do a number of different things with it, including installing WordPress, creating an SSL certificate, modifying your DNS, and other useful tasks.
Do you use cPanel? What guides would you like to see us make for it? Let us know in the comments!
No comments:
Post a Comment